
Blur vs. Redact: When to Use a Solid Block Instead of Blur
Blur softens a region; redaction covers it completely. Learn when a solid block is the safer choice for privacy, and when blur is enough.
October 23, 2026|Toolbox Image|#redact #blur-image#privacy#image-tools
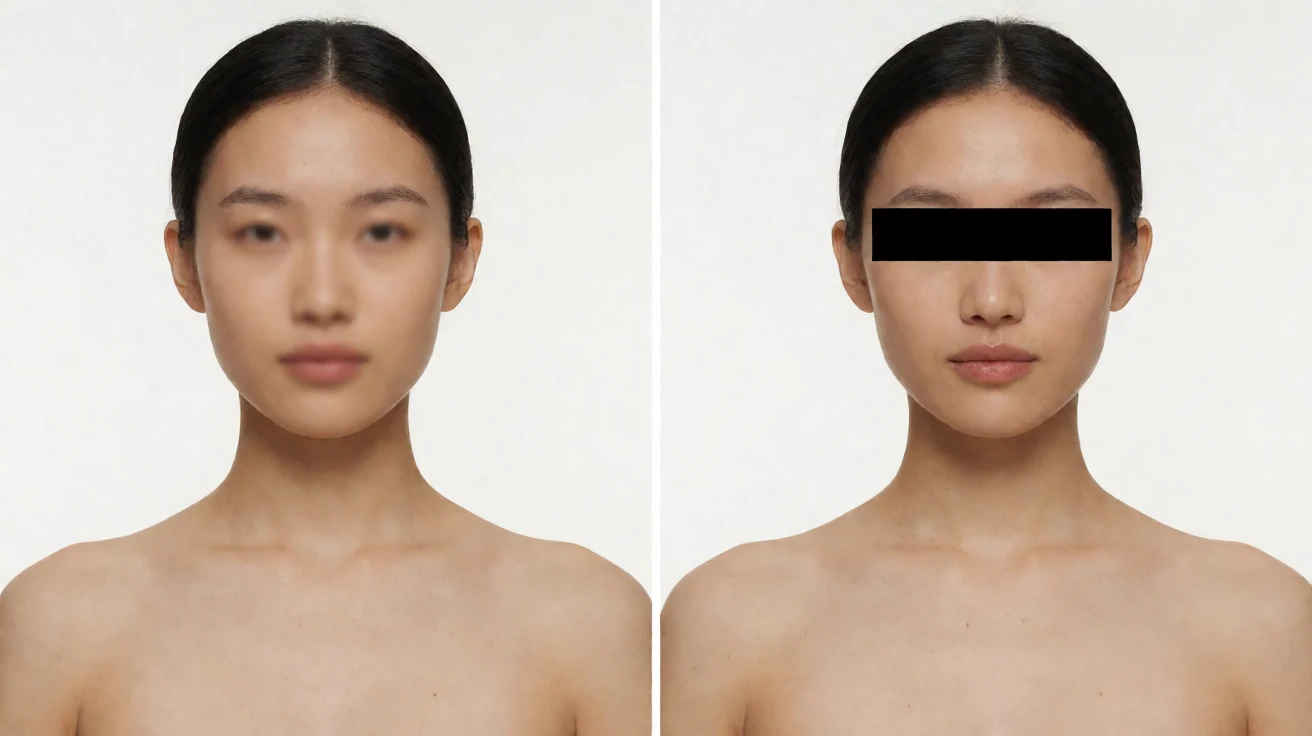
Blur vs. Redact: When to Use a Solid Block Instead of Blur
When you want to hide something in a photo, your first instinct is usually to blur it. Blur is fast, looks natural, and keeps the image readable. But blur is not always the safest choice. For the most sensitive details, a solid block — true redaction — is better.
This guide explains the difference, when each one is appropriate, and how to choose the right method before you share an image.
Blur, Redact, Pixelate and Censor: One Decision Table
People use these four words interchangeably, but they are not the same operation and they do not offer the same protection. If you only remember one thing: blur changes how a region looks; redaction removes the information. Everything else is a variation on those two ideas.
| Method | What it does to the pixels | Can the original be recovered? | Best for | Avoid when |
|---|---|---|---|---|
| Gaussian blur | Averages neighbouring pixels with a radius you choose | Partly — strong blur can be attacked with deconvolution | Backgrounds, faces in casual photos, aesthetic softening | ID numbers, account numbers, legal or medical documents |
| Pixelation (mosaic) | Replaces each block with one averaged value | Very hard below ~12 px blocks, but small blocks leak shapes | Screenshots, plates, UI text | Print-ready documents (looks unprofessional) |
| Noise / scramble | Randomises pixel values inside the region | Effectively no | Small text fields, QR codes, barcodes | Anything that must stay visually calm |
| Solid redaction | Writes one flat colour over the region, permanently | No — irreversible | Forms, contracts, medical reports, anything legally sensitive | Photos where context matters |
Strength values that actually work
These are working settings for a 1080p image, not vague “use a strong blur” advice:
- 12–14 px body text in a screenshot: a Gaussian radius of 2–4 px is not enough — OCR can still guess short words. Use 8–12 px, or a 10–14 px mosaic block.
- Large headings (24 px+): go to 16 px radius or a 20 px block. Big letterforms survive weak blur.
- Licence plates: characters are roughly 20–30 px tall on a 1080p photo. A 16–24 px block plus 8 px of margin around the whole plate is the safe choice.
- QR codes and barcodes: do not blur them. Blur may still leave a scannable pattern after contrast enhancement — use a solid block.
Three concrete calls
- A chat screenshot with a phone number: solid block over the number only, then export as PNG.
- A street photo with three strangers: gaussian 10–14 px on each face, with a few pixels of margin so hair and jaw edges do not peek out.
- A bank statement PDF turned into a JPG: solid redaction on account number, name and sort code. Never blur these — the digits are high-contrast and short.
One export mistake that undoes everything
Do not re-encode the finished image as a low-quality JPEG (quality below ~70) or run a sharpen filter afterwards. Compression artefacts and sharpening restore some of the edges you just removed. Export as PNG when the redaction matters, and zoom to 100% and re-read the area before you send it.
Where the other guides went
We previously published separate articles on pixelate vs blur and on censoring photos. They covered the same decision as this page, so we merged their useful parts here and redirected them. This page is now the single reference for choosing a concealment method.
Quick Takeaways
-
Use Toolbox Image for both blur and solid-block redaction in one place.
-
Blur softens a region; a solid block removes it completely.
-
Use a solid block for card numbers, CVV, signatures, and anything highly sensitive.
-
Use blur when the area should stay visually present but unreadable.
-
When in doubt, block it — a covered detail is safer than a softened one.
What Blur Actually Does
Blur averages nearby pixels so the detail becomes a smooth smudge. The shape often remains, and with enough skill or a light blur, parts of the original can still be guessed.
Blur is best when:
-
You want the image to still look like a real photo
-
The hidden detail is low-risk (a background face, a minor object)
-
The viewer only needs to know “something was there,” not what it was
-
You are protecting privacy casually, not hiding critical data
What Redaction (a Solid Block) Does
Redaction replaces the region with a flat, opaque block. There is nothing to reconstruct. The original pixels are gone from the shared image.
Redaction is best when:
-
The detail is high-risk: card numbers, CVV, signatures, medical data
-
The image will be public or widely shared
-
You need certainty that the detail cannot be recovered
-
Compliance or safety requires it
Blur vs. Redact at a Glance
| Factor | Blur | Solid Block |
|---|---|---|
| Reversibility | Sometimes partially readable | Not recoverable |
| Look | Natural, soft | Obvious, deliberate |
| Best for | Background faces, minor details | Card numbers, CVV, signatures |
| Effort | Fast | Fast |
| Certainty | Lower | Higher |
Neither is “better” in all cases. The right choice depends on the risk, not the convenience.
A Simple Decision Rule
Ask one question: If this image leaks, how bad is it if someone reads this detail?
-
Low stakes → blur is fine.
-
High stakes (money, identity, health, legal) → use a solid block.
When you are unsure, the safe default is the block. You can always choose blur for lower-risk areas in the same image.
Mixing Both in One Image
You do not have to pick one method for the whole photo. A good redaction job often uses both:
-
Blur the background faces to keep the scene natural.
-
Block the card number and CVV with solid rectangles.
-
Blur a street sign but block a license plate if it identifies a home.
This layered approach protects the critical details while keeping the image useful.
Common Situations and the Right Call
A Payment Photo
Block the card number and CVV. Blur the expiry if you keep it. Never just lightly blur the number.
A Signed Contract
Block or strongly pixelate the signature. Blur is acceptable only for casual, trusted sharing.
A Group Photo
Blur the faces that should not be identifiable. Block only if a face is highly sensitive (a minor in a public post, for example).
A Screenshot With an Address
Blur a partial address for light privacy, or block it entirely if the image is public.
Tips for Clean Redaction
-
Make the block slightly larger than the detail so no edge peeks out.
-
Use a flat, opaque color — not a semi-transparent one.
-
Verify at full size that nothing shows through.
-
If you blur first and later decide to block, re-edit from the original, not the blurred copy.
Common Mistakes to Avoid
Trusting a Light Blur on Sensitive Data
A soft blur on a card number can leave digits readable. Block sensitive data instead.
Using a Transparent Overlay
A semi-transparent box is not redaction — the detail shows through. Use a solid, opaque block.
Blurring, Then Sharing the Original
Keep the original private. The shared file should contain only the redacted version.
Assuming Blur Equals Safe
Blur reduces readability; it does not guarantee privacy. For high-risk details, block.
FAQ
Is blur or redaction better for privacy?
Redaction (a solid block) is safer because the detail cannot be recovered. Blur is fine for low-risk areas.
Can someone reverse a blur?
A light blur can sometimes be partially reconstructed. Strong blur or pixelation is harder, but a solid block is the only guaranteed method.
Should I blur or block a signature?
For sensitive documents, block or strongly pixelate the signature. Blur only for casual, trusted sharing.
Can I use both in one image?
Yes. Blur low-risk areas to keep the scene natural, and block high-risk details for certainty.
Does Toolbox Image support both?
Yes. Toolbox Image lets you blur, pixelate, or apply a solid block to any selected region.
Final Thoughts
Blur and redaction solve the same problem in different ways. Blur is graceful; redaction is certain. Knowing which to use is the difference between “probably hidden” and “definitely hidden.”
Before you share an image, decide per detail: blur the low-risk parts, block the high-risk ones. Open Toolbox Image and apply both in a single edit.
Related image editing guides
Pixelate vs. Blur
Learn the difference between pixelation and blur and when each masking style fits.
Censor a Photo Online
A practical guide to censoring sensitive parts of a photo before sharing.
Blur Part of an Image Online
Learn how to blur one region of a photo while keeping the rest clear.
Box Select and Freehand Blur
Learn when to use box select and when freehand selection gives better control.